DSC_0921

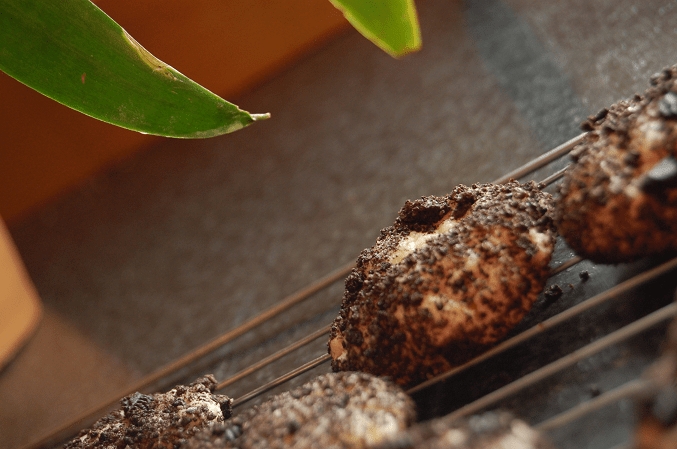
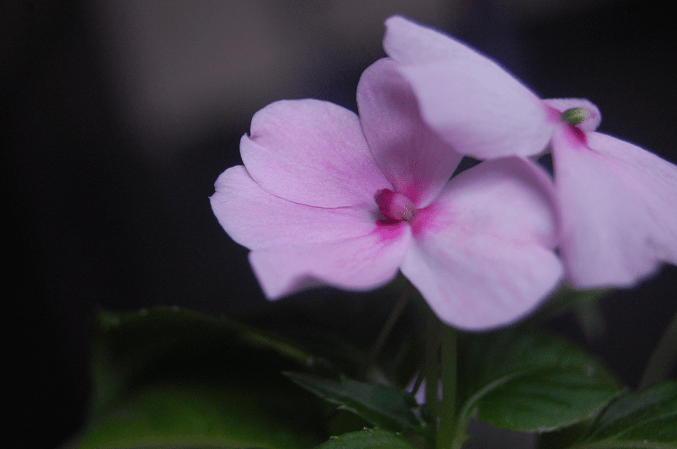
This is one strong little plant that I have yet to kill.  It has been frozen, forgotten, dried up, and left.  Amanda and I started it from seeds probably close to ten years ago now, and it still blooms. 

I don’t have what one would refer to as a green thumb.  Infact its probably more on the brown side.  I don’t know why – I just cannot for the life of me, remember to water a plant.  I will remember a few weeks down the road that oh yea, there is a plant that needs water.  It doesn’t matter if the plant is right in front of me – as most plants are, they just simply, don’t register as needing water.  Its even worse for the poor plants that live out of sight – out of sight out of mind has never been more true.  If the plants that live right in front of me day after day lack water, its safe to assume the ones OUT of sight – are well, out of luck.

Amanda loves her some plants.  Anything green she loves.  She is constantly buying little plants and growing them into giant plants.  Dreaming up how to get trees to grow in the living room, and how to haul the next big green thing into the house.  I assume the reason her plants get watered, is driven only by her love of all things green.  Plant doesn’t get watered – it doesn’t stay green.  Must water plant to have green.

Mom also loves plants.  Maybe I should rephrase that.  Mom.  LOVES plants.  And plants LOVE here.  She has the ability to grow plants from just a leaf!  She talks to them, pampers them, waters them (ahem) on a weekly schedule, prunes them, and whatever else one does with plants.  And in turn, the plants love her back – and grow wildly.  While I struggle to grow weeds – mom has potted flowers all over the office and house.

Usually – my lack of plant watering ability doesn’t affect me that much.  I forget for months at a time, and the plants thrive.

A few years ago – Amanda fell in love with a tree like plant at a store.  She brought that silly thing home, and it has been here ever since.  A few months ago I mentioned it was droopy looking and Amanda asked me the last time I watered it.  Water!  Such a noble concept!  Sadly, the cats water it more than I do.  Just being honest folks.

Sadly now with Amanda being so far away, and mom having joined her for a few months – the plant watering duty has been left to me.  I kept up my duty of watering the plants every Friday for a good solid month.  Really, watering a plant 4 times a month should NOT be that difficult.  But it is!  For whatever reason!

Last year a neighbor asked if I would watch her house while she was out of town for the winter months.  Having done this before, I agreed and then she added “oh and if you would water the plants too…”  A lump settled into my throat.  Plants.  I told myself.  Would not be getting the better of me.  And so every Friday afternoon me and my water jug would head up the hill, where I would perform my duty of watering the little green sprouts.  They weren’t happy looking, but they were alive.  And that was my goal.  Keep.  Plants.  Alive.

One morning I woke up feeling somewhat cold.  It wasn’t until I checked the temperatures that I realized why.  We were in a deep, cold, freeze.  “PLANTS!” I yelled before jumping out of bed.

I burst into the house later that morning and froze.  There in front of me were 4 very sad, very frozen plants.  “NOOOOOO!!!!” I yelled before racing down the road towards home.  Since mom was out of town I turned to my next best option: dad.  Figuring he might know a thing or two about plants I asked for some help.  It wasn’t until he kind of laughed did I realize I was in big trouble.  I talked to the plants.  I carefully separated their frozen leaves from each other and even scoured the internet for ideas.  Plastic bags went over the top.  I lined them all up in a not too hot but not too cold room and hoped for the best.

The next morning, the limp, sad, droopy, very much not alive plants greeted me.  My heart sunk.  I made the dreaded phone call to inform the neighbor (who by the sound of my voice assumed her house had burnt to the ground) that her plants had died in the night.  She sounded relieved.

But a few weeks ago, she stopped by to say hello which is when I noticed.  Her causal small talk and jaunt around the office wasn’t to check up to see how we were doing.  She was checking on the plants.  Watering them.  And making sure they were all still very much alive.

I guess after her plants tragic deaths – she hasn’t trusted me with moms plants.

Youd think after all that I could remember to water a plant, but sadly, I still cant.  And with that note – I am off to water plants because after all!  It IS Friday.  We just wont talk about how many Fridays have went in-between waterings!

Happy Weekend, Everyone!

DSC_0925

Hi mom!  Im mostly just kidding about not watering your plants.  They are all still very much alive, and missing you.

Merry Christmas to all!  I’ve been feeling very Christmas-y lately, which may or may not mean I have all my presents bought, somehow it seems I’m forgetting a few things…oh well, maybe Santa will stop by and fill in this year!  We do have the fireplace decorated after-all, that has to count for something.  JD has been obsessed with pulling stockings down, and along with them the entire string system I have to hold them up.

David told me the other day “You might have to move those stockings somewhere else.”

“NO!” I said “I CAN’T do that! When Santa comes down that chimney Christmas Eve, he’s not gonna have time to hunt around for stockings, if they aren’t on the mantle then he’s gonna leave without putting presents in them!”

So I devised a blockade around the access point to that side of the room, and JD has been unsuccessful in breaking through so far.  And the stockings are still there, empty, but cheerfully and rather optimistically waiting for Santa.

Among the various items on my to-do list, were a whole host of DIY projects…in an attempt to save money, and mostly just because it’s so much fun! Most of the time that is, Mom and I have been doing lots of random Christmas Crafts, you’d think we were getting ready for a Christmas bazaar.  (That’s a fun word to type by the way, bazaar)

For gifts, one of the projects was DIY sharpie mugs.  Now, I had read a wide array of reports online about whether or not the sharpies would stay in place on the mugs.  And I have to say, I was a bit concerned.  But I thought “well I will buy a sharpie and test it, and if that doesn’t work, I will buy a pen specifically meant for mugs.”  So without further ado, I went online and ordered 10 white mugs, and one teacup and saucer for the tea drinker.

I bought a bunch of mugs here

mug

This was a UK site.  Only 1.29 each.  That’s pounds of course, not dollars, but a google search of “white mug” in google shopping should show even more options for mugs in the USA.  I wanted one that looked nice, not a tacky cheap looking shape, but one that didn’t cost too much either, and these fit the bill.

Supplies:

Sharpies

Mugs

That’s it!  I used black sharpies because I read that the colored ones change color when baked.   I put verses and quotes, flowers and drawings all over the mugs.  Mom helped too.  It was fun, and if you make a mistake you can just wipe it clean with a damp cloth.

Here are some of the designs:

IMGP0017

1cups

IMGP0086

You could write and decorate someone’s name, or a funny line that would make them laugh.  For a coffee fan we put ” Doing my part to keep the coffee industry financially strong.”  You could write on plates or mugs, but I chose mugs because Sharpies are not food grade, and the outside of the mug doesn’t matter as much as the inside does.  (That sounds like a Bible verse there!)

Then we put them in the oven to bake.  We put  it on gas mark 6 for 1 whole hour.  Gas mark 6 on our oven is about  375 Fahrenheit . Some places online suggested half hour, some said 1 hour.  So we did a really high temperature and baked them a long time.  And then we tested the designs out…so far they haven’t rubbed off, and seem to be on there pretty permanently!  Yay!

I tested one of the mugs in the oven first, just to make sure the high temperature wouldn’t crack it.  I didn’t want to run the risk of breaking ten mugs all at once.

Christmas time is coming…it’ll be here soon.  Hope you are all almost ready!

Snowflake flowers….made from none other than….toilet paper rolls and paper towel rolls. Or, as the call them here in England, toilet roll and kitchen roll. Now, before you say ew ‘nope’ and click away, read on, the finished project actually looks nothing like the original paper towel holders I assure you.

Of course I hadn’t taken any during shots, because I forgot that I might blog this later…so today I piled up the supplies used and snapped a picture of them, just to show what was used in this project.

IMGP0102

Supplies:

Paper towel rolls

Glitter

Paint -I used white

Paintbrushes

Glue

Glitter

…and one Mom to help!

Here’s what we did:

Crease the paper towel holders like this.

IMGP0098

Then cut them into 1/2 inch strips.

IMGP0105

Then we painted the pieces white, and arranged and glued them like this.  This picture shows them still brown.

IMGP0107

Then we put the glue and glitter on the outside.  And here is the end result!

starflowers2

Add some string…

starflowers

We hung these up along the beam in our ceiling.  They could work great as ornaments too though, but we have a small tree this year -the first time ever for me to have a small tree-  and the snowflake flowers were a bit big for the tiny tree.  I think these can also be glued together into a circle to make a wreath.  Anyways, that’s what we did the other day.  It was easy and pretty fun…hope that you all are having fun with any Christmas projects you are doing this year.

Merry Christmas everyone!

2010   2011 & 2011 again

The Cast of Characters this year is as follows (recipes and credit linked):

Gum Drop Candies

DSC_0847

I had a little bit of an issue with these, but that was my own fault.  I decided to use some gelatin that we have had from…who knows when.  Probably 40 years.  Just kidding about that part.  But it was pretty old.  Having never used it before I didnt know if it was suppose to “Smelly funny” or not.  Turns out – old gelatin and peppermint flavoring (that I used to try and mask the funny smell) didnt work in my favor.  I made a new batch – and flavored it with kool-aid and jello (cherry and lime – the peppermint just wasnt working for me) and after fighting with pans of sticky goo and finally getting it cut into little squares – they turned out pretty cute, I think.  And the second batch didnt taste too bad either.  Making them was easy.  Cutting them was difficult.  But the end result was too cute.

Tip: I used a slightly wet spatula to get the mixture out of the pan, and then a slightly wet knife to cut them into squares – dont use too much water, but it helped manage the intense sticky.

Peppermint Fudge

DSC_0845

This is a tried and true recipe from probably three or four years ago.  Simple yet soooo good!

Peppermint Bark

DSC_0844

I have always had a problem with melting chocolate.  Im not sure why, I just do.  Especially with the brown chocolate.  I did succeed last night by melting a little bit of butter, getting the pan hot and adding the chocolate chips, peppermint extract and a little bit of milk all at the same time.  Stir until melted.  I also figure out that if you wet a spoon it helps with spreading it on the pan.

Tip: I found an easier way to crush the candy canes this – instead of chopping them up and having pieces go everywhere, put them in a plastic bag and hit them with a hammer, just make sure the bag is on a cutting board of the floor and you arent hammering up the counter!  Its really quite fun, and good for a stress relief!

Oreo Cheesecake Cookies

DSC_0855

These are a BIG hit here.  However, Amanda attempted to make them over in England and said they did NOT turn out.  Im thinking we didnt make the same thing because these are seriously so good!  I think she over did the flour (the dough will be a bit soft) and they didnt turn out because of that.  So good!  And SO easy!

Tip: I opt out of adding the extra chocolate chips, and they turned out just fine.

Sugar Cookies

DSC_0862

The usual suspects.  The old fashion sugar cookies topped with cream cheese frosting.  YUM!  I went looking for the recipe, and could not find it anywhere online the way that we usually make them.

Maybe its a family secret?

Either way here is a similar one.

Tip:  This can easily be halved to make a smaller batch.

Homemade Sugar Cookies:

  • 3 cups powdered sugar
  • 2 cups butter or margarine, softened
  • 2 teaspoons vanilla
  • 1 teaspoon almond extract
  • 2 eggs
  • 5 cups all-purpose flour
  • 2 teaspoons baking soda
  • 2 teaspoons cream of tartar

In large bowl, beat powdered sugar, butter, vanilla, almond extract and eggs with electric mixer on medium speed.
Stir in flour, baking soda and cream of tartar.
Cover and refrigerate at least 2 hours

Heat oven to 375°F.
Divide dough in half. On lightly floured surface, roll each half 1/8 inch thick.
Cut into desired shapes.
Place about 2 inches apart on cookie sheet.
Bake 5-7 Minutes or until edges are lightly brown.

Happy Baking!